iKnow Math

What is iKnow?

iKnow Math is an assessment package allowing teachers, school or district administrators to easily assign tests to a student, multiple students, or all students in a class, school, grade or district. Use iKnow to assign Universal Screening, Benchmark/Grade Level, and Progress Monitoring assessments.


Who Can Access iKnow?

If your district or school purchased a plan with iKnow Math, students, teachers, school administrators, and district administrators have access. On the iLearn Hub after logging at www.ilearn.com/login, all available iLearn programs and utilities display in color.

iLearn Hub Teacher View


What’s Included in iKnow?

Educators (teachers, school and district administrators) can create and assign three types of iKnow assessments: Universal Screening, Benchmark/Grade Level, and Progress Monitoring.

  1. Universal Screening – A Universal Screening assessment is typically assigned at the start of the school year. Each assessment includes access to multiple tests. Students begin a Universal Screener one grade level below their currently enrolled grade (by default) or at any other grade level specified. Students have the option to take grade level tests in sequence back to grade one. We suggest you have students complete tests until scoring 90%+ correct. If students do this before starting iPASS, they can skip the Placement Tests, as iPASS will use the Screening results instead.
  2. Benchmark/Grade Level - A Benchmark assessment is typically assigned three to four times throughout the school year, and is a single test at the student’s enrolled grade level. District and school administrators can assign Benchmark assessments; teachers can assign Grade Level assessments. Both assessments are the same type test, but Benchmark tests enhance reporting at the school and district levels. Both of these tests match the enrolled grade level at which the student is registered in iLearn (8th graders receive an 8th grade test, 4th graders receive a 4th grade test).
  3. Progress Monitoring – A Progress Monitoring assessment is typically assigned by the teacher once every few weeks during an intervention period or throughout the school year, and is a single grade level test. Educators can assign any grade level test to any student.


Convenience

iKnow provides educators an easy and convenient option to assign to all students or a select group of students at any point during the school year. Educators create one assessment and assign it to all students in a district, school, or class, and each student will be assigned the correct grade level test without the educator having to manually select the test for each student. This allows a district administrator, for example, to create and assign a Benchmark assessment for all students in a school with each student receiving the appropriate grade level test.


How Students Access iKnow

Students log into www.ilearn.com/login and click iKnow hub icon next to “iKnow.” Students have access to only the assessments that have 1) been assigned by teachers, school or district administrators, and 2) have due dates that have not expired.

iLearn Hub Student View

How iKnow Works – District Administrators

With iKnow, teachers, school and district administrators create and assign assessments to all or some of their students. District administrators can assign assessments to all students in a district, or a select group of students. School administrators can assign to all students in a school, or a select group of students. Teachers can assign to all students in their classes, or a select group of students.

How to Build an iKnow Assessment

Log into www.ilearn.com/login with a district administrator login.

iLearn Hub Teacher View

From the iLearn Hub, click LMS hub icon next to “Management (LMS),” which launches the Management utility.

LMS View with iKnow Manager Highlighted

Click “Tools” in the upper right, and select “iKnow Manager.”

iKnow Manager Home Screen

The initial list of active assessments will be empty as above. On the left are two options: Create New Assessment and Get Assessment Details.

  • Create New Assessment – click to create a new assessment
  • Get Assessment Details – click to view the students assigned to the assessment, edit, or delete the assessment

At the top are two tabs: Active Assessments and Expired Assessments.

  • Active Assessments – all assessments for which the due date has not yet passed
  • Expired Assessments – all assessments for which the due date has already passed (the due date of these assessments can be changed to be active for select students or all students)

To create a new assessment, click Create New Assessment icon above “Create New Assessment” And select Universal Screener, Benchmark, or Progress Monitoring.

Create New Assessment Window

  • Universal Screening – a series of tests in one assignment, that begins one grade level below the student’s enrolled grade and moves sequentially backward by grade level to grade one
  • Progress Monitoring – a single test, typically assigned every few weeks, in which the grade level is determined by the educator using data from multiple programs, to measure progress at the level of learning
  • Benchmark – a single test typically assigned three or four times during the school year, at the student’s enrolled grade level

Creating a Universal Screening Assessment

A Universal Screening assessment is a series of tests starting one grade level below a student’s enrolled grade level and moving backward by grade level to grade one. Click Universal Screening icon to create a Universal Screening assessment.

Create Universal Screening 1

This requires the following:

  1. Name of assessment – in the top left, enter a name for the assessment. We suggest something unique and highly descriptive so you and your students can easily identify the correct assessment when students select the assessment and when you report on the results.
  2. Due Date – to the right is “Use Default Due Date.” You can assign a due date for all students assigned to the assessment or assign individual due dates. Select “Use Default Due Date” when you want the selected due date to be the same for all students. Select “Individual Date Control” when you want to assign differing due dates to students.
  3. Set Due Date and Time – click the calendar next to the date displayed and select a date for the assessment to expire. Then, select a time on that day. The assessment will expire on that day at that time, Eastern Time.

To assign students click the box next to each student’s name, or assign all students by clicking Select All icon . To assign a group of students (but not all students), click a student’s name, press and hold “shift” on your keyboard, and click the last student’s name in the group, then click Toggle Highlighted icon . If you need to scroll down, simply continue to hold the “shift” key while clicking the down arrow in the bottom right, or dragging the scroll bar. Clicking the Select All button will add a check to the left, and assign this group of students.

Create Universal Screening 2

For a Universal Screening, the first test a student will take will be one grade level below their registered grade level. To change the first test from the default to a different grade level, click the number shown in the field ‘Suggested First Assessment” for each student and type a new number.

Create Universal Screening 1

The student will start at that grade level test, and can complete tests in sequence at lower grades back to grade one. The student can stop at any time but we strongly recommend the student continuing until scoring 90%+ correct or completing the grade 1 test. To see the current status of students taking the Screener, view the Universal Screening reports, and specifically the “Screening Summary.”

Once the assessment has been named, the Default Due Date choice is made, a due date and time set, and students are assigned, click Save icon . The students assigned have access to this assessment until the expiration date/time. If additional time is needed for one or all students, simply edit the date here in the iKnow Manager.


Creating a Progress Monitoring Assessment

A Progress Monitoring assessment is a single test at a grade level determined by previous results in iLearn programs, or a different grade level selected by the educator. Start by clicking the Progress Monitoring icon button.

Create Progress Monitoring 1

This requires the following:
  1. Name the assessment – in the top left, enter the name. We suggest a unique and highly descriptive name that allows students to select the correct test, and for you to view the correct assessment in reports.
  2. Due Date Default – to the right is “Use Default Due Date.” You can assign a due date for all students assigned to the assessment or assign individual due dates. Select “Use Default Due Date” when you want the selected due date to be the same for all students. Select “Individual Date Control” when you want to assign differing due dates to students.
  3. Set Due Date and Time – click the calendar next to the date displayed and select a date for the assessment to expire. Then, select a time on that day. The assessment will expire on that day at that time, Eastern Time.

To assign students click the box next to each student’s name, or assign all students by clicking Select All icon . To assign a group of students (but not all students), click a student’s name, press and hold “shift” on your keyboard, and click the last student’s name in the group, then click Toggle Highlighted icon . If you need to scroll down, simply continue to hold the “shift” key while clicking the down arrow in the bottom right, or dragging the scroll bar. Clicking the Select All button will add a check to the left, and assign this group of students.

iKnow allows you to assign any grade level test deemed appropriate, to any student. The Progress Monitoring builder suggests a grade level test based on your selection on the right, seen below. The suggestions are: iLearn Default, Last Progress Monitoring Grade Level, iPASS Location Grade Level, Universal Screening Calculated Grade Level, and Student’s Enrolled Grade Level.

Create Progress Monitoring 2

  1. iLearn Default – suggests a grade level for each student based on the grade level displayed in the rightmost entry in the columns to the left of the suggested grade level, checking for an entry in sequence from right to left, 1) the last progress monitoring test, 2) current grade level in iPASS, 3) the grade level indicated by the Universal Screener, and 4) the enrolled grade level. If a grade is displayed in multiple columns, the suggested grade is the one appearing in the column furthest to the right. As an example, if the only column displaying a number is the Enrolled Grade Level, this will be the column furthest to the right and will be the suggested grade level for the student.
  2. Last Progress Monitoring Grade Level – suggests the same grade level for the most recent Progress Monitoring assessment assigned to the student. If the student has not yet taken a Progress Monitoring assessment, the student’s Enrolled Grade Level is suggested.
  3. iPASS Location Grade Level – suggests the grade level in which the student is currently working in iPASS. If the student has not started working in iPASS, the student’s Enrolled Grade Level is suggested. If the student is working in grade 4 in iPASS, and “iPASS Location Grade Level” is selected from the options, the suggested test will be grade level 4.
  4. Universal Screening Calculated Grade Level – suggests the highest grade level in which the student scored 90%+ on in the Universal Screening assessment. If the student did not take a Universal Screener, the student’s Enrolled Grade Level will be suggested.
  5. Student’s Enrolled Grade Level – suggests the student’s enrolled grade level.

If you deem any students appropriate test grade level to be different, you can change the suggested grade level by clicking the student’s grade that displays under Grade Level for Assessment and typing your selected grade. After saving, the student is assigned the grade level you type.

Create Progress Monitoring 3

Once the assessment has been named, a due date default set, a due date and time set, and students are assigned, click Save icon . The students assigned have access to this assessment until the expiration date/time. If additional time is needed for one or all students, simply edit the date here in the iKnow Manager.


Creating a Benchmark Assessment

A Benchmark assessment is a single test at the student’s enrolled grade level. Click Progress Monitoring icon to begin.

Create Benchmark 1

This requires the following:

  1. Name of assessment – in the top left, enter a name for the assessment. We suggest something unique and highly descriptive so you and your students can easily identify the correct assessment when students select the assessment and when you report on the results.
  2. Due Date Default – to the right is “Use Default Due Date.” You can assign a due date for all students assigned to the assessment or assign individual due dates. Select “Use Default Due Date” when you want the selected due date to be the same for all students. Select “Individual Date Control” when you want to assign differing due dates to students.
  3. Set Due Date and Time – click the calendar next to the date displayed and select a date for the assessment to expire. Then, select a time on that day. The assessment will expire on that day at that time, Eastern Time.

To assign students click the box next to each student’s name, or assign all students by clicking Select All icon . To assign a group of students (but not all students), click a student’s name, press and hold “shift” on your keyboard, and click the last student’s name in the group, then click Toggle Highlighted icon . If you need to scroll down, simply continue to hold the “shift” key while clicking the down arrow in the bottom right, or dragging the scroll bar. Clicking the Select All button will add a check to the left, and assign this group of students.

Create School Benchmark 2

The Benchmark assessment allows educators to assign grade level tests to students. The grade level of the test matches the student’s enrolled grade. Educators can choose to assign a Long Form Assessment, typically 20-30 questions, or a Short Form Assessment, typically 10-15 questions.

Create School Benchmark 1

The grade level test in a Benchmark assessment cannot be changed. Each student will only receive the grade level test matching their enrolled grade.

Once the assessment is named, the Default Due Date choice is made, the due date/time are set, and students are assigned, click Save icon . The students assigned have access to this assessment until the expiration date/time. If additional time is needed for one or all students, simply edit the date here in the iKnow Manager.


Editing an Assessment

After an assessment is saved, two types of edits can be made:

  1. Edit Assessment – add or remove students assigned
  2. Delete Assessment – permanently delete the assessment, along with all results of student activity.

To edit, on the iKnow manager home screen click an assessment to edit.

iKnow Manager Home Screen

Click Assignment Details icon above “Get Assessment Details” to view the details of that assessment (you can also double click the assessment in the list).

iKnow Manager Edit Screen

To add or remove students from the assessment, click Assignments icon above “edit assignments.”

Create School Benchmark 1

Add or remove students by checking or unchecking the box next to a student’s name.

Important: Removing students from the assessment results in the student no longer seeing the assessment, and a loss of all data/activity in the assessment. If you only want to add additional students to the assessment just check the box next to those student’s names, but do not uncheck other students.

After you have added or removed students from the assigned list, click Save icon,

To delete an assessment, on the iKnow manager home screen, click an assessment to edit. iKnow Manager Home Screen

Click Assignment Details icon above “Get Assessment Details” to view the details (you can also double click the assessment from the list).

iKnow Manager Edit Screen

To delete the assessment, click Assignment Delete icon above “delete assessment.” The following message displays:

Assignment Delete Confirmation Message

Click Yes to permanently remove the assessment and all results, or click No to cancel.

Once an assessment has been created by a district administrator (whether assigned to students or not), it also appears on the iKnow manager home screens for all school administrators and teachers. Both teachers and school administrators have the ability to assign and remove students from an assessment created by a district administrator.

As a district administrator, use this to easily make and assign assessments across an entire district, or make assessments that you’d like others to assign to their students.

How iKnow Works – School Administrators

With iKnow, teachers, school and district administrators create and assign assessments to all or some of their students. District administrators can assign assessments to all students in a district, or a select group of students. School administrators can assign to all students in a school, or a select group of students. Teachers can assign to all students in their classes, or a select group of students.

How to Build an iKnow Assessment

Log into www.ilearn.com/login with a school administrator login.

iLearn Hub Teacher View

From the iLearn Hub, click LMS hub icon next to “Management (LMS),” which launches the Management utility.

LMS View with iKnow Manager Highlighted

Click “Tools” in the upper right, and select “iKnow Manager.”

iKnow Manager Home Screen

The initial list of active assessments will be empty as above. On the left are two options: Create New Assessment and Get Assessment Details.

  • Create New Assessment – click to create a new assessment.
  • Get Assessment Details – click to view the students assigned to the assessment, edit, or delete the assessment.

At the top are two tabs: Active Assessments and Expired Assessments.

  • Active Assessments – all assessments for which the due date has not yet passed
  • Expired Assessments – all assessments for which the due date has already passed (the due date of these assessments can be changed to be active for select students or all students)

To create a new assessment, click Create New Assessment icon above “Create New Assessment” And select Universal Screener, Benchmark, or Progress Monitoring.

Create New Assessment Window

  • Universal Screening – a series of tests in one assignment, that begins one grade level below the student’s enrolled grade and moves sequentially backward by grade level to grade one
  • Progress Monitoring – a single test, typically assigned every few weeks, in which the grade level is determined by the educator using data from multiple programs, to measure progress at the level of learning
  • Benchmark – a single test typically assigned three or four times during the school year, at the student’s enrolled grade level


Creating a Universal Screening Assessment

A Universal Screening assessment is a series of tests starting one grade level below a student’s enrolled grade level and moving backward by grade level to grade one. Click Universal Screening icon to create a Universal Screening assessment.

Create Universal Screening 1

This requires the following:

  1. Name of assessment – in the top left, enter a name for the assessment. We suggest something unique and highly descriptive so you and your students can easily identify the correct assessment when students select the assessment and when you report on the results.
  2. Due Date – to the right is “Use Default Due Date.” You can assign a due date for all students assigned to the assessment or assign individual due dates. Select “Use Default Due Date” when you want the selected due date to be the same for all students. Select “Individual Date Control” when you want to assign differing due dates to students.
  3. Set Due Date and Time – click the calendar next to the date displayed and select a date for the assessment to expire. Then, select a time on that day. The assessment will expire on that day at that time, Eastern Time.

To assign students click the box next to each student’s name, or assign all students by clicking Select All icon . To assign a group of students (but not all students), click a student’s name, press and hold “shift” on your keyboard, and click the last student’s name in the group, then click Toggle Highlighted icon . If you need to scroll down, simply continue to hold the “shift” key while clicking the down arrow in the bottom right, or dragging the scroll bar. Clicking the Select All button will add a check to the left, and assign this group of students.

Create Universal Screening 2

For a Universal Screening, the first test a student will take will be one grade level below their registered grade level. To change the first test from the default to a different grade level, click the number shown in the field ‘Suggested First Assessment” for each student and type a new number.

Create Universal Screening 1

The student will start at that grade level test, and can complete tests in sequence at lower grades back to grade one. The student can stop at any time but we strongly recommend the student continuing until scoring 90%+ correct or completing the grade 1 test. To see the current status of students taking the Screener, view the Universal Screening reports, and specifically the “Screening Summary.”

Once the assessment has been named, the Default Due Date choice is made, a due date and time set, and students are assigned, click Save icon . The students assigned have access to this assessment until the expiration date/time. If additional time is needed for one or all students, simply edit the date here in the iKnow Manager.


Creating a Progress Monitoring Assessment

A Progress Monitoring assessment is a single test at a grade level determined by previous results in iLearn programs, or a different grade level selected by the educator. Start by clicking the Progress Monitoring icon button.

Create Progress Monitoring 1

This requires the following:
  1. Name the assessment – in the top left, enter the name. We suggest a unique and highly descriptive name that allows students to select the correct test, and for you to view the correct assessment in reports.
  2. Due Date Default – to the right is “Use Default Due Date.” You can assign a due date for all students assigned to the assessment or assign individual due dates. Select “Use Default Due Date” when you want the selected due date to be the same for all students. Select “Individual Date Control” when you want to assign differing due dates to students.
  3. Set Due Date and Time – click the calendar next to the date displayed and select a date for the assessment to expire. Then, select a time on that day. The assessment will expire on that day at that time, Eastern Time.

To assign students click the box next to each student’s name, or assign all students by clicking Select All icon . To assign a group of students (but not all students), click a student’s name, press and hold “shift” on your keyboard, and click the last student’s name in the group, then click Toggle Highlighted icon . If you need to scroll down, simply continue to hold the “shift” key while clicking the down arrow in the bottom right, or dragging the scroll bar. Clicking the Select All button will add a check to the left, and assign this group of students.

Create Progress Monitoring 2

iKnow allows you to assign any grade level test deemed appropriate, to any student. The Progress Monitoring builder suggests a grade level test based on your selection on the right, seen below. The suggestions are: iLearn Default, Last Progress Monitoring Grade Level, iPASS Location Grade Level, Universal Screening Calculated Grade Level, and Student’s Enrolled Grade Level.

Create Progress Monitoring 2

  1. iLearn Default – suggests a grade level for each student based on the grade level displayed in the rightmost entry in the columns to the left of the suggested grade level, checking for an entry in sequence from right to left, 1) the last progress monitoring test, 2) current grade level in iPASS, 3) the grade level indicated by the Universal Screener, and 4) the enrolled grade level. If a grade is displayed in multiple columns, the suggested grade is the one appearing in the column furthest to the right. As an example, if the only column displaying a number is the Enrolled Grade Level, this will be the column furthest to the right and will be the suggested grade level for the student.
  2. Last Progress Monitoring Grade Level – suggests the same grade level for the most recent Progress Monitoring assessment assigned to the student. If the student has not yet taken a Progress Monitoring assessment, the student’s Enrolled Grade Level is suggested.
  3. iPASS Location Grade Level – suggests the grade level in which the student is currently working in iPASS. If the student has not started working in iPASS, the student’s Enrolled Grade Level is suggested. If the student is working in grade 4 in iPASS, and “iPASS Location Grade Level” is selected from the options, the suggested test will be grade level 4.
  4. Universal Screening Calculated Grade Level – suggests the highest grade level in which the student scored 90%+ on in the Universal Screening assessment. If the student did not take a Universal Screener, the student’s Enrolled Grade Level will be suggested.
  5. Student’s Enrolled Grade Level – suggests the student’s enrolled grade level.

If you deem any students appropriate test grade level to be different, you can change the suggested grade level by clicking the student’s grade that displays under Grade Level for Assessment and typing your selected grade. After saving, the student is assigned the grade level you type.

Create Progress Monitoring 3

Once the assessment has been named, a due date default set, a due date and time set, and students are assigned, click Save icon . The students assigned have access to this assessment until the expiration date/time. If additional time is needed for one or all students, simply edit the date here in the iKnow Manager.


Creating a Benchmark Assessment

A Benchmark assessment is a single test at the student’s enrolled grade level. Click Progress Monitoring icon to begin.

Create Benchmark 1

This requires the following:

  1. Name of assessment – in the top left, enter a name for the assessment. We suggest something unique and highly descriptive so you and your students can easily identify the correct assessment when students select the assessment and when you report on the results.
  2. Due Date Default – to the right is “Use Default Due Date.” You can assign a due date for all students assigned to the assessment or assign individual due dates. Select “Use Default Due Date” when you want the selected due date to be the same for all students. Select “Individual Date Control” when you want to assign differing due dates to students.
  3. Set Due Date and Time – click the calendar next to the date displayed and select a date for the assessment to expire. Then, select a time on that day. The assessment will expire on that day at that time, Eastern Time.

To assign students click the box next to each student’s name, or assign all students by clicking Select All icon . To assign a group of students (but not all students), click a student’s name, press and hold “shift” on your keyboard, and click the last student’s name in the group, then click Toggle Highlighted icon . If you need to scroll down, simply continue to hold the “shift” key while clicking the down arrow in the bottom right, or dragging the scroll bar. Clicking the Select All button will add a check to the left, and assign this group of students.

Create School Benchmark 2

The Benchmark assessment allows educators to assign grade level tests to students. The grade level of the test matches the student’s enrolled grade. Educators can choose to assign a Long Form Assessment, typically 20-30 questions, or a Short Form Assessment, typically 10-15 questions.

Create School Benchmark 1

The grade level test in a Benchmark assessment cannot be changed. Each student will only receive the grade level test matching their enrolled grade.

Once the assessment is named, the Default Due Date choice is made, the due date/time are set, and students are assigned, click Save icon . The students assigned have access to this assessment until the expiration date/time. If additional time is needed for one or all students, simply edit the date here in the iKnow Manager.


Editing an Assessment

After an assessment is saved, two types of edits can be made:

  1. Edit Assessment – add or remove students assigned
  2. Delete Assessment – permanently delete the assessment, along with all results of student activity

To edit, on the iKnow manager home screen click an assessment to edit.

iKnow Manager Home Screen

Click Assignment Details icon above “Get Assessment Details” to view the details of that assessment (you can also double click the assessment in the list).

iKnow Manager Edit Screen

To add or remove students from the assessment, click Assignments icon above “edit assignments.”

Create School Benchmark 1

Add or remove students by checking or unchecking the box next to a student’s name.

Important: Removing students from the assessment results in the student no longer seeing the assessment, and a loss of all data/activity in the assessment. If you only want to add additional students to the assessment just check the box next to those student’s names, but do not uncheck other students.

After you have added or removed students from the assigned list, click Save icon,

To delete an assessment, on the iKnow manager home screen, click an assessment to edit.

iKnow Manager Home Screen

Click Assignment Details icon above “Get Assessment Details” to view the details (you can also double click the assessment from the list).

iKnow Manager Edit Screen

To delete the assessment, click Assignment Delete icon above “delete assessment.” The following message displays:

Assignment Delete Confirmation Message

Click Yes to permanently remove the assessment and all results, or click No to cancel.

Once an assessment has been created by a school administrator (whether assigned to students or not), it also appears on the iKnow manager home screens for all teachers. Teachers have the ability to assign and remove students from an assessment created by a school administrator.

As a school administrator, use this to easily make and assign assessments across an entire school, or make assessments that you’d like others to assign to their students.


How iKnow Works – Teachers

With iKnow, teachers, school and district administrators create and assign assessments to all or some of their students. District administrators can assign assessments to all students in a district, or a select group of students. School administrators can assign to all students in a school, or a select group of students. Teachers can assign to all students in their classes, or a select group of students.

How to Build an iKnow Assessment

Log into www.ilearn.com/login with a teacher login.

iLearn Hub Teacher View

From the iLearn Hub, click LMS hub icon next to “Management (LMS),” which launches the Management utility.

LMS View with iKnow Manager Highlighted

Click “Tools” in the upper right, and select “iKnow Manager.”

iKnow Manager Home Screen

The initial list of active assessments will be empty as above. On the left are two options: Create New Assessment and Get Assessment Details.

  • Create New Assessment – click to create a new assessment.
  • Get Assessment Details – click to view the students assigned to the assessment, edit, or delete the assessment.

At the top are two tabs: Active Assessments and Expired Assessments.

  • Active Assessments – all assessments for which the due date has not yet passed
  • Expired Assessments – all assessments for which the due date has already passed (the due date of these assessments can be changed to be active for select students or all students)

To create a new assessment, click Create New Assessment icon above “Create New Assessment” And select Universal Screener, Benchmark, or Progress Monitoring.

Create New Assessment Window

  • Universal Screening – a series of tests in one assignment, that begins one grade level below the student’s enrolled grade and moves sequentially backward by grade level to grade one
  • Progress Monitoring – a single test, typically assigned every few weeks, in which the grade level is determined by the educator using data from multiple programs, to measure progress at the level of learning
  • Grade Level – a single test, typically assigned three or four times during the school year, at the student’s enrolled grade level


Creating a Universal Screening Assessment

A Universal Screening assessment is a series of tests starting one grade level below a student’s enrolled grade level and moving backward by grade level to grade one. Click Universal Screening icon to create a Universal Screening assessment.

Create Universal Screening 1

This requires the following:

  1. Name of assessment – in the top left, enter a name for the assessment. We suggest something unique and highly descriptive so you and your students can easily identify the correct assessment when students select the assessment and when you report on the results.
  2. Due Date – to the right is “Use Default Due Date.” You can assign a due date for all students assigned to the assessment or assign individual due dates. Select “Use Default Due Date” when you want the selected due date to be the same for all students. Select “Individual Date Control” when you want to assign differing due dates to students.
  3. Set Due Date and Time – click the calendar next to the date displayed and select a date for the assessment to expire. Then, select a time on that day. The assessment will expire on that day at that time, Eastern Time.

To assign students click the box next to each student’s name, or assign all students by clicking Select All icon . To assign a group of students (but not all students), click a student’s name, press and hold “shift” on your keyboard, and click the last student’s name in the group, then click Toggle Highlighted icon . If you need to scroll down, simply continue to hold the “shift” key while clicking the down arrow in the bottom right, or dragging the scroll bar. Clicking the Select All button will add a check to the left, and assign this group of students.

Create Universal Screening 2

For a Universal Screening, the first test a student will take will be one grade level below their registered grade level. To change the first test from the default to a different grade level, click the number shown in the field ‘Suggested First Assessment” for each student and type a new number.

Once the assessment has been named, the Default Due Date choice is made, a due date and time set, and students are assigned, click Save icon . The students assigned have access to this assessment until the expiration date/time. If additional time is needed for one or all students, simply edit the date here in the iKnow Manager.


Creating a Progress Monitoring Assessment

A Progress Monitoring assessment is a single test at a grade level determined by previous results in iLearn programs, or a different grade level selected by the educator. Start by clicking the Progress Monitoring icon button.

Create Progress Monitoring 1

This requires the following:
  1. Name the assessment – in the top left, enter the name. We suggest a unique and highly descriptive name that allows students to select the correct test, and for you to view the correct assessment in reports.
  2. Due Date Default – to the right is “Use Default Due Date.” You can assign a due date for all students assigned to the assessment or assign individual due dates. Select “Use Default Due Date” when you want the selected due date to be the same for all students. Select “Individual Date Control” when you want to assign differing due dates to students.
  3. Set Due Date and Time – click the calendar next to the date displayed and select a date for the assessment to expire. Then, select a time on that day. The assessment will expire on that day at that time, Eastern Time.

To assign students click the box next to each student’s name, or assign all students by clicking Select All icon . To assign a group of students (but not all students), click a student’s name, press and hold “shift” on your keyboard, and click the last student’s name in the group, then click Toggle Highlighted icon . If you need to scroll down, simply continue to hold the “shift” key while clicking the down arrow in the bottom right, or dragging the scroll bar. Clicking the Select All button will add a check to the left, and assign this group of students.

Create Progress Monitoring 2

iKnow allows you to assign any grade level test deemed appropriate, to any student. The Progress Monitoring builder suggests a grade level test based on your selection on the right, seen below. The suggestions are: iLearn Default, Last Progress Monitoring Grade Level, iPASS Location Grade Level, Universal Screening Calculated Grade Level, and Student’s Enrolled Grade Level.

Create Progress Monitoring 2

  1. iLearn Default – suggests a grade level for each student based on the grade level displayed in the rightmost entry in the columns to the left of the suggested grade level, checking for an entry in sequence from right to left, 1) the last progress monitoring test, 2) current grade level in iPASS, 3) the grade level indicated by the Universal Screener, and 4) the enrolled grade level. If a grade is displayed in multiple columns, the suggested grade is the one appearing in the column furthest to the right. As an example, if the only column displaying a number is the Enrolled Grade Level, this will be the column furthest to the right and will be the suggested grade level for the student.
  2. Last Progress Monitoring Grade Level – suggests the same grade level for the most recent Progress Monitoring assessment assigned to the student. If the student has not yet taken a Progress Monitoring assessment, the student’s Enrolled Grade Level is suggested.
  3. iPASS Location Grade Level – suggests the grade level in which the student is currently working in iPASS. If the student has not started working in iPASS, the student’s Enrolled Grade Level is suggested. If the student is working in grade 4 in iPASS, and “iPASS Location Grade Level” is selected from the options, the suggested test will be grade level 4.
  4. Universal Screening Calculated Grade Level – suggests the highest grade level in which the student scored 90%+ on in the Universal Screening assessment. If the student did not take a Universal Screener, the student’s Enrolled Grade Level will be suggested.
  5. Student’s Enrolled Grade Level – suggests the student’s enrolled grade level.

If you deem any students appropriate test grade level to be different, you can change the suggested grade level by clicking the student’s grade that displays under Grade Level for Assessment and typing your selected grade. After saving, the student is assigned the grade level you type.

Create Progress Monitoring 3

Once the assessment has been named, a due date default set, a due date and time set, and students are assigned, click Save icon . The students assigned have access to this assessment until the expiration date/time. If additional time is needed for one or all students, simply edit the date here in the iKnow Manager.


Creating a Grade Level Assessment

A Grade Level assessment is a single test at the student’s enrolled grade level. Click Grade Level icon to begin.

Create Grade Level 1

This requires the following:

  1. Name of assessment – in the top left, enter a name for the assessment. We suggest something unique and highly descriptive so you and your students can easily identify the correct assessment when students select the assessment and when you report on the results.
  2. Due Date Default – to the right is “Use Default Due Date.” You can assign a due date for all students assigned to the assessment or assign individual due dates. Select “Use Default Due Date” when you want the selected due date to be the same for all students. Select “Individual Date Control” when you want to assign differing due dates to students.
  3. Set Due Date and Time – click the calendar next to the date displayed and select a date for the assessment to expire. Then, select a time on that day. The assessment will expire on that day at that time, Eastern Time.

To assign students click the box next to each student’s name, or assign all students by clicking Select All icon . To assign a group of students (but not all students), click a student’s name, press and hold “shift” on your keyboard, and click the last student’s name in the group, then click Toggle Highlighted icon . If you need to scroll down, simply continue to hold the “shift” key while clicking the down arrow in the bottom right, or dragging the scroll bar. Clicking the Select All button will add a check to the left, and assign this group of students.

Create Grade Level 2

The Grade Level assessment allows teachers to assign a grade level test to students. The grade level of the test matches the student’s enrolled grade. Teachers can choose to assign a Long Form Assessment, typically 20-30 questions, or a Short Form Assessment, typically 10-15 questions.

Create Grade Level 3

The level a student takes in a Grade Level assessment cannot be changed. Each student will only receive the grade level test matching their enrolled grade.

Once the assessment is named, the Default Due Date choice is made, the due date/time are set, and students are assigned, click Save icon . The students assigned have access to this assessment until the expiration date/time. If additional time is needed for one or all students, simply edit the date here in the iKnow Manager.


Editing an Assessment

After an assessment is saved, two types of edits can be made:

  1. Edit Assessment – add or remove students assigned
  2. Delete Assessment – permanently delete the assessment, along with all results of student activity

To edit, on the iKnow manager home screen click an assessment to edit.

iKnow Manager Home Screen

Click Assignment Details icon above “Get Assessment Details” to view the details of that assessment (you can also double click the assessment in the list).

iKnow Manager Edit Screen

To add or remove students from the assessment, click Assignments icon above “edit assignments.”

Create School Benchmark 1

Add or remove students by checking or unchecking the box next to a student’s name.

Important: Removing students from the assessment results in the student no longer seeing the assessment, and a loss of all data/activity in the assessment. If you only want to add additional students to the assessment just check the box next to those student’s names, but do not uncheck other students.

After you have added or removed students from the assigned list, click Save icon,

To delete an assessment, on the iKnow manager home screen, click an assessment to edit.

iKnow Manager Home Screen

Click Assignment Details icon above “Get Assessment Details” to view the details (you can also double click the assessment from the list).

iKnow Manager Edit Screen

To delete the assessment, click Assignment Delete icon above “delete assessment.” The following message displays:

Assignment Delete Confirmation Message

Click Yes if you want to permanently remove the assessment and all results, or click No to cancel.

How iKnow Works – Students

Students log in at www.ilearn.com/login and click iKnow hub icon next to "iKnow."

iKnow Home Screen Student View

The student can click any active assessment. Naming the assessment in a very descriptive manner will allow the student to easily select the appropriate test from multiple items in the list.

To enter an assessment, the student clicks the blue play button on the right. The student must answer all questions in the assessment for it to be marked as complete, and for the test to be evaluated and reported. The average completion time is less than 15 minutes.


Program Interface

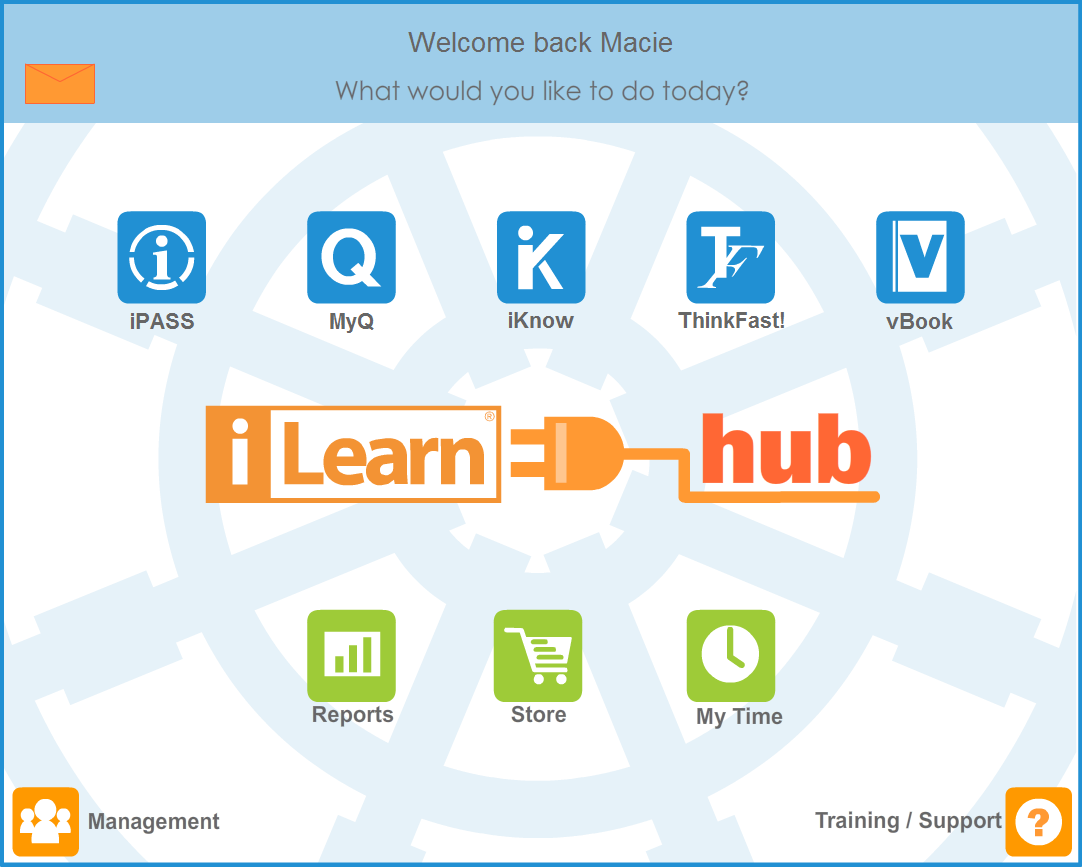
At the top of the screen are these four buttons: Option buttons

Option buttons

Change Program: Returns the student to the iLearn Hub.


Reports button

Reports: Takes the student to view individual student reports.


Settings button

Settings: Allows the student to move the keypad to the left or right.


Logout Button

Logout: Logs the student out of all iLearn. The student should log out using this button rather than closing the browser.


The program interface provides important information for both the student and the teacher.

iKnow Top Bar

iKnow Test Name

The top bar reading “Grade Level” is the Assessment the student is working in.

iKnow Return Home

The logo on the left identifies the program so the teacher can easily see it across the classroom, and is a button for the student to return to the iKnow homepage.

iKnow Top Bar 2

This section above displays the student name (allowing the teacher to verify student are logged in as themselves), navigation buttons, and the current activity. The navigation buttons are not active in iKnow. Students can neither move forward to later questions, nor move back to previous questions.

iKnow Location and Page # Bar

This section shows the student’s location in iKnow. Above, the student is working in a Grade Level 2 test. “Page” shows the current page in the test, and the Question Status shows the number of questions the student has answered.

iPass Time Bar

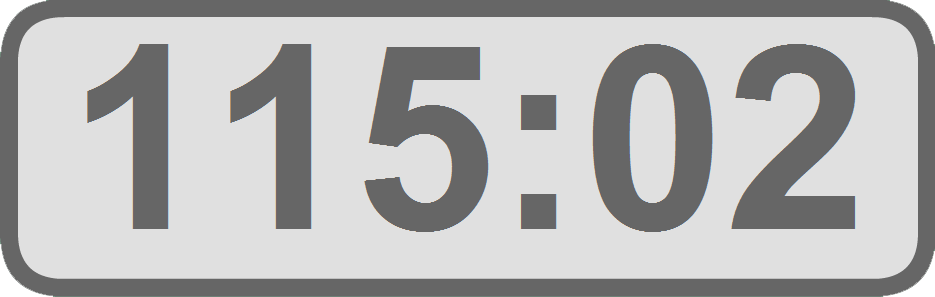
In iKnow, the Time indicator represents the amount of time remaining for the test. All tests have a time limit of 120 minutes which is ample for any test in the program.

iPass Side Bar

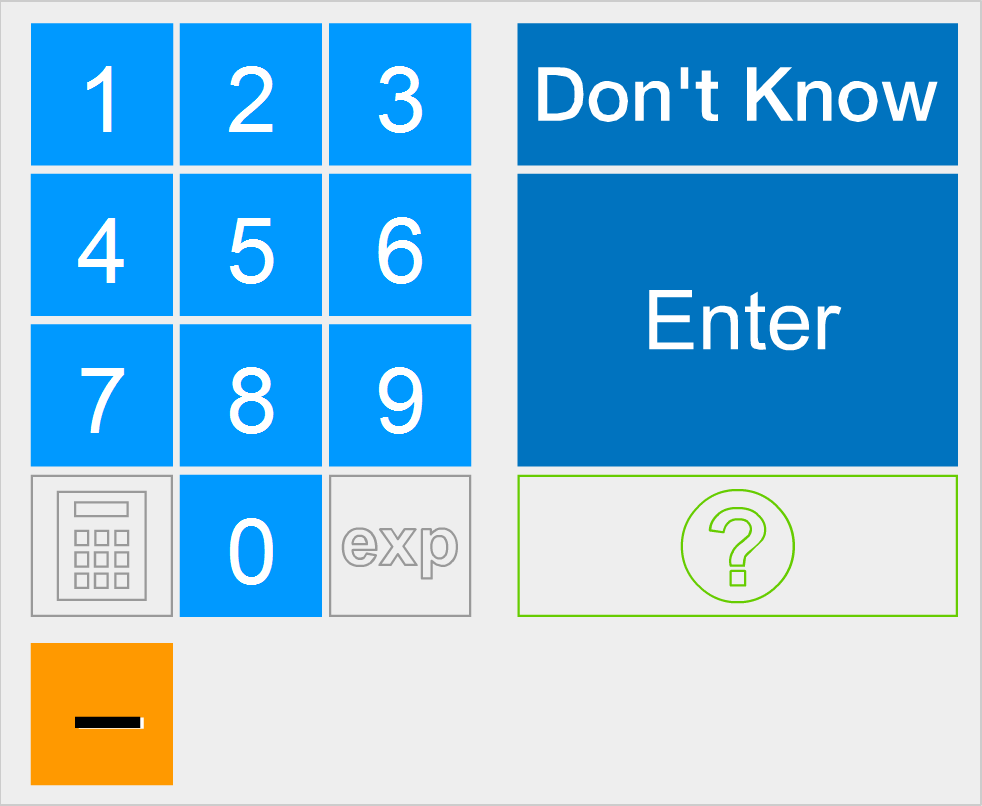
The keypad is the on-screen tool for entering answers. Students may use the mouse to click the appropriate buttons to enter an answer. They can also use the computer’s keyboard to answer questions. The keypad is not active in Lesson Instruction where attention is focused on multimedia presentations.

Some questions require students to enter operands, variables, and/or symbols. Orange buttons will display dynamically, i.e. when needed, to accommodate the characters needed to answer.

The calculator is available for only some questions where instructionally appropriate.

Do’s and Don’ts (Best Practice) with iKnow

  1. Do take advantage of the new ability for district administrators to easily create and assign Universal Screeners and Benchmark assessments to all appropriate students in a district. It’s simple and takes just a few minutes. It also dramatically streamlines reporting, particularly for districts with significant student transfers between schools during the school year. If you need help with this please contact us.
  2. Do utilize iKnow’s capability for you to create only one assessment such as Benchmark or Universal Screener for ALL students. Each student accesses the appropriate level test regardless of their enrolled grade. A Benchmark, for example, delivers the 3rd grade test to all 3rd graders, and the 7th grade test to all 7th graders.
  3. Do give extra time on the due date when building assessments. In a perfect world, no student would miss class and all students would complete the assessment on or before the due date. The reality is some students may miss school for a few days. By adding a few extra days to the assessment due date, you can help make sure all students finish the assessment before the expiration (due) date. If a student does miss the expiration date, the date for that student can still be easily extended by the teacher or any administrator.
  4. Don’t deselect (unassign) students from an assessment when adding new students to that assessment. Leave the assigned students, and simply add the new ones. For more info, see “Editing an Assessment” in this document.

General Usage Tips

With iKnow, district and school administrators, and teachers can create and assign to any students.

Creating Universal Screeners at the start of the school year allows educators to identify gaps as well as strengths in student knowledge, and gives educators the ability to personalize an education plan.

Creating Benchmark assessments 3-4 times throughout the school year allows educators to measure a student’s progress in grade level content, and allows educators to give extra help to students who need more assistance.

Creating Progress Monitoring assessments every 2-3 weeks allows educators to track a student’s progress at any level of learning back to grade level, while providing assistance to students who need more help on certain topics.

We suggest using iKnow in any capacity that best benefits your students. We also suggest monitoring the reports whenever you assign an assessment to quickly determine real-time status, and to identify student weaknesses to address them more quickly.


In Conjunction with Other iLearn Programs

Depending on what your school or district purchased, students could have access to a number of different programs; some students may only have vBook, and some may have all programs. Each iLearn program can be used independently, or in conjunction with another specific program. It’s always best to coordinate at the district or school level to make the best of instructional time, and that includes assessment to individualize learning for all students.


iKnow and All Other Programs

The five programs and basic functionality are:

  1. vBook – a student-choice instructional program giving access to any content at any time
  2. iPASS – a mastery-based instructional program that delivers only the content needed, starting with the earliest knowledge gap. Students proceed sequentially to higher content, based on skipping content by passing Challenge (Pre) Tests, and by passing Mastery (Post) Tests, with the program making content delivery decisions based on student performance
  3. MyQ – a teacher-controlled instructional program in which teachers assign queues of grouped content. Students can only access the content the teacher assigns, and only as assigned, in a Fixed Order or Any Order.
  4. iKnow – a teacher-controlled assessment program allowing teachers to assign tests. Students can only access the tests assigned, which include benchmark, universal screener, and progress monitoring tests.
  5. ThinkFast! – a mastery-based instructional program for fluency on the basic math facts, that delivers only the content a student needs. Students proceed sequentially, with the program making content delivery decisions based on student performance.

iLearn offers programs with content controlled by you the teacher, or the student, or the computer. We suggest understanding each program and planning a strategy to meet your goals. However, here are some suggestions on how to get started:

  1. Start the school year with a Universal Screening assessment in iKnow. This will allow you to assess the strengths and weaknesses of each student at prior grade levels.
  2. Use iPASS with at-risk students, with advanced students, or ALL students to address critical needs below grade level, solidify grade level competence, and provide opportunities beyond grade level.
  3. Use MyQ and/or vBook to assign grade level content to all students. Use vBook for verbal or written assignments, or MyQ to control student access to the content.
  4. Use ThinkFast! for any and all students who might improve fluency with the basic facts, or have difficulty passing the fluency sections in iPASS.


iKnow by Itself

Use iKnow at the beginning of the school year to identify students at-risk, and to identify strengths and weaknesses at grade level and at all grades below.

Use iKnow to measure how well prepared students are for an upcoming exam in class, or an end of year test.

Use iKnow throughout the year to track a student’s progress at the level of learning including prior grade levels up to and beyond grade level!